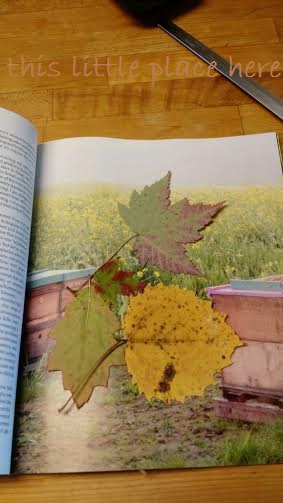
The leaves were so pretty, their colors so perfectly saved, that I decided I was going to collect leaves this Fall and then preserve them in wax. There are so many possible uses for leaves that won't dry out and crumble away to dust: strung together as a garland and hung across a window or wall, made into a wreath, just pretty bright spots on a table or mantle (not that I have a mantle, but hey, if I did I could put leaves on it!). . . I can't even begin to imagine all the ways I could decorate with leaves. I mean, decorating is something fairly new to me--most of my adult life has been spent raising a houseful of kids and there wasn't money or space (or time!) for many objects whose sole purpose was to look nice; no, things had to be functional rather than just pretty.
But, as my kids grew up and moved away and money got slightly less tight and my time got a little freer, I have begun to dabble in decorating. All as cheaply as possible, of course. I still can't bring myself to spend a load of money on something just because I think it looks nice. Form to function is still my mantra. Anyhoo. . .
I present to you, my
First, I collected some leaves while out hiking in the Keweenaw Peninsula this past weekend when DH, DS2 and I went to visit DD2 at her college (and DS2's alma mater). DD2 and I were really getting into it, finding all sorts of leaves that were just starting to change color. Since DD2's major is Wildlife Ecology, she has many outdoorsy types of classes and this semester one of them is Trees. I'm sure it has some more impressive sounding name, but pretty much it is a class in tree identification. Now, plant identification has always been a hobby of mine, so she and I had a blast 'finding' different trees by looking for a variety of leaves for my leaf project.
Once our hike was done, I knew I needed a way to keep my leaves 'fresh' so they didn't end up dried up and crushed before I could get home and find time to dip them in the wax. I always pack a variety of reading material when I go on a car trip, and I happened to have the latest issue of Taproot magazine in my travel bag. Putting my leaves between the pages of Taproot seemed an excellent--and fitting--way to transport them home.
But, I knew they wouldn't stay nice forever just tucked away between the pages, so when I was ready to melt the wax, I took them out.
In order to melt the wax and not sacrifice any of my cookware, I used the same sauce pan that I dissolve the fels naptha in while making laundry soap. That became the 'bottom' of a double boiler I rigged up by washing out a large can (from baked beans earlier in the week) real well and using that can as the 'top' of the double boiler: water went in the sauce pan and a couple slabs of paraffin went into the can, then I put the whole thing on medium heat on the stove.
While the wax was melting, I put down a few layers of newspaper on the kitchen island to lay the leaves on once they had been waxed. I didn't want to have to deal with scraping wax off my butcher block when done, you see.
Then, it was time to start dipping!
Holding each leaf by the stem, I dipped them one at a time into the melted wax. Since the wax didn't fill the can (that would have been way more than I needed), I had to tilt and roll the can a little in order to coat some of the larger/wider leaves all the way.
Once dipped, the leaves went into a single layer on the newspaper until cooled, which didn't take but a few minutes. When I was all done, I found that some of the leaves had kind of stuck to the paper, but I was able to remedy that by grabbing my frosting spreader out of the drawer and using it to slide between the leaf and the newspaper to release the leaves that were stuck. I could have used a knife for the same purpose, but the frosting spreader was closer to where I was working.
After all the leaves were cooled and loosened I took a picture and sent it to DD2.
I love the way the leaves turned out. The wax really brightened up their colors so they actually look like the day DD2 and I found them rather than dried leaves pressed in a book (or magazine).
This would be an excellent craft to do with kids of all ages. All you need is some wax (paraffin aka Gulf Wax or other 'clear' wax), a bunch of leaves, some news paper, and a makeshift double boiler (pan+water+clean tin can).


These are so beautiful. Thank you for such a great tutorial. I can make these with my little grandson as a craft project. Wishing you the best, Pat xx
ReplyDelete