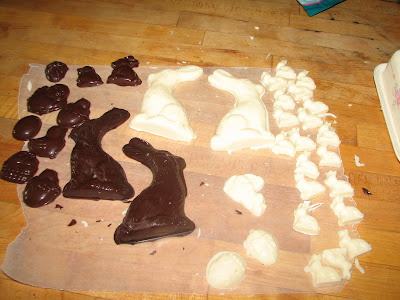
No, these little bunnies I'm making are the chocolate kind, for Easter. It's a very simple process (much simpler than dispatching real bunnies).
1. Get ahold of some candy molds. I found mine at Goodwill. They can also be purchased online.
2. Buy some melt and pour chocolates. Some grocery stores have them, also some of the mega craft stores carry them. Do an online search and I'm sure you can find somewhere nearby to purchase them. If not, there's always a website for buying them.
3. Slowly melt your chocolate either in a double boiler, or in the microwave on 50% power. Be very careful not to overheat your chocolate, or they won't set up. Just heat until you can stir them smooth. Do not touch the chocolate with your fingers! Number one rule of working with chocolate for making candies: don't touch it with your skin! As much as you'll be tempted to stick your finger in it and sample it, don't! The oils from your skin can mess up the chocolate so that it won't firm up in the molds.
white chocolate 'wafers' in the double boiler
heated and stirred just until melted and smooth
4. Spoon your molten chocolate into your molds.
6. You can let your chocolate cool either at room temperature, in the fridge, or in the freezer. I chose to do mine in the freezer (in which case a 'big' bunny like in the picture above takes about 15 minutes to firm up) because I was doing a large batch (7 big bunnies, to be exact, plus several rounds of mini bunnies) and didn't want to take all afternoon.
7. When your chocolate is completely cooled and firm, turn the mold over and gently tap to remove. Don't twist the mold or try to push the chocolate out! You can break your mold this way. Instead, just kind of hold the mold in both hands and snap your wrists in a downward direction a few times above the counter top if the candy doesn't just fall out when you turn the mold upside down.
There you have it, a litter of little bunnies!
dark chocolate and white chocolate bunnies
milk chocolate bunnies
(and a few dark chocolate other shapes)


No comments:
Post a Comment