On Sunday, DH and I canned up roughly a bushel of tomatoes we'd picked earlier in the week. Came out to twenty-one quarts. Yesterday, as I was transferring the cooled, sealed, and labeled jars from my kitchen island down to the shelves in the cellar, I did a count of how many jars of tomatoes I've put up in the last month. 36 quarts, 27 pints. Started with pints, then ran out of jars and switched to quarts.
If you tally that up, 36 quarts equals 72 pints, so all together I have 99 pints of tomatoes in the cellar. I do believe that is enough to last us for at least the next twelve months, so I am now done canning tomatoes as diced tomatoes. I will use the final ones the garden produces this season to make sauce, salsa, and juice.
When I informed DH of the number of tomatoes we had on hand, he got a mischievous twinkle in his eye and began to sing "Ninety-nine pints of tomatoes in the cellar, ninety-nine pints of tomatoes. . . Take one down, pass it around, ninety-eight pints of tomatoes in the cellar. . ."
Ha ha. Funny guy. It is a really nice feeling to know that we won't have to spend any money on buying canned tomatoes from the grocery store for a long, long time. Such a nice feeling that I can't quite hold myself back from joining in the singing.
"Ninety-nine pints of tomatoes in the cellar, ninety-nine pints of tomatoes. . . " :0)
Random thoughts and experiences on my little piece of earth. Kids, gardening, chickens, heating with wood, hunting, food preservation and much more!
Tuesday, September 18, 2012
Monday, September 17, 2012
I Tried Making Spent Grain Bread
Several years ago, DH found a recipe for bread using the 'spent grains' leftover from making wort when you are doing all grain brewing (as opposed to using powdered malt or liquid malt in a can). We've done all grain brewing for, hmm let me think back, six or seven years now. Usually we let the grains cool after mashing and sparging, then feed them to the chickens.
This weekend, however, after DH was done sparging, I dug up that bread recipe, and gave it a try.
Let me say here and now that this post will not contain that recipe for you to make in your own home. Because it's not quite right. I read through it, thought it sounded a bit off on some of the ingredients and the baking temperature but followed it to the letter anyway. That's what I do when I try a new recipe: make it exactly as told. It's after than initial test batch that I begin tweaking. And this one definitely needs some tweaking. Someday, in the future (after the next batch of homebrew when I have spent grains again. . .) I'll give you the improved recipe. But for now, you just get to hear my foray into making spent grain bread.
First, I didn't think the amount of yeast sounded sufficient. But I followed the recipe anyway, using the small amount called for. The dough took forever and a day (okay, over an hour and a half) to double in size.
Once it had finally swelled to the correct size, I punched it down and divided in two--the recipe didn't really say to divide, but referred to baking "loaves" not "loaf", so I inferred I should divide it. Each dough ball I shaped roughly into loaf form, and put on a greased cookie sheet. Given the lack of rapid growth on the first rise, I elected to not place my loaves into 9" x 5" x 3" bread pans, but make flatter 'artisan bread' shaped loaves.
These I covered with a cloth and let rise. For some reason, the loaves doubled in size in about half an hour versus the hour and a half plus it took on the first rise. No, my kitchen was not warmer then, in fact, given that the first rise happened next to the stove while I was cooking dinner and the second rise happened on the island (more room for the cookie sheet), I'd wager the immediate area of the dough was a bit cooler on the second rise.
Okay, whatever, I can go with it. So I heated the oven to the prescribed temp of 375 degrees (hmm, all my other yeast bread recipes go on 400 or 425. . . ) and then baked the loaves on the bottom rack of the oven for 35 minutes.
Tapping the top of the loaves, they gave that familiar 'thunk' of cooked bread ready to come of out of the oven, and had a golden brown crust. So I took them out and set them on a cooling rack to cool.
Verdict upon slicing the mostly cooled bread: very dense, and chewy, but almost doughy/gooey still inside. Delicious flavor, and definitely edible. I'm thinking next time, though, I'll increase the baking temperature up to at least 400 and decrease the baking time accordingly (25-30 minutes total).
DH decided it wasn't really something he wanted to eat as toast or as bread and butter. Which meant I now had to figure out how to use two loaves of yummy but gooey bread. Here's what I came up with:
tomato cheese 'bruschetta'!
Thick slice (at least 1" thick) the spent grain bread, top with swiss or provolone cheese, and add sliced tomatoes fresh from the garden. Broil for approx. 3 minutes. MMMMMMM!
All we have left now is half of one loaf of bread. :0)
This weekend, however, after DH was done sparging, I dug up that bread recipe, and gave it a try.
Let me say here and now that this post will not contain that recipe for you to make in your own home. Because it's not quite right. I read through it, thought it sounded a bit off on some of the ingredients and the baking temperature but followed it to the letter anyway. That's what I do when I try a new recipe: make it exactly as told. It's after than initial test batch that I begin tweaking. And this one definitely needs some tweaking. Someday, in the future (after the next batch of homebrew when I have spent grains again. . .) I'll give you the improved recipe. But for now, you just get to hear my foray into making spent grain bread.
First, I didn't think the amount of yeast sounded sufficient. But I followed the recipe anyway, using the small amount called for. The dough took forever and a day (okay, over an hour and a half) to double in size.
Once it had finally swelled to the correct size, I punched it down and divided in two--the recipe didn't really say to divide, but referred to baking "loaves" not "loaf", so I inferred I should divide it. Each dough ball I shaped roughly into loaf form, and put on a greased cookie sheet. Given the lack of rapid growth on the first rise, I elected to not place my loaves into 9" x 5" x 3" bread pans, but make flatter 'artisan bread' shaped loaves.
These I covered with a cloth and let rise. For some reason, the loaves doubled in size in about half an hour versus the hour and a half plus it took on the first rise. No, my kitchen was not warmer then, in fact, given that the first rise happened next to the stove while I was cooking dinner and the second rise happened on the island (more room for the cookie sheet), I'd wager the immediate area of the dough was a bit cooler on the second rise.
Okay, whatever, I can go with it. So I heated the oven to the prescribed temp of 375 degrees (hmm, all my other yeast bread recipes go on 400 or 425. . . ) and then baked the loaves on the bottom rack of the oven for 35 minutes.
Tapping the top of the loaves, they gave that familiar 'thunk' of cooked bread ready to come of out of the oven, and had a golden brown crust. So I took them out and set them on a cooling rack to cool.
Crust much more golden in person than it looks in this picture!
(Darn lighting anyway. . . )
Verdict upon slicing the mostly cooled bread: very dense, and chewy, but almost doughy/gooey still inside. Delicious flavor, and definitely edible. I'm thinking next time, though, I'll increase the baking temperature up to at least 400 and decrease the baking time accordingly (25-30 minutes total).
DH decided it wasn't really something he wanted to eat as toast or as bread and butter. Which meant I now had to figure out how to use two loaves of yummy but gooey bread. Here's what I came up with:
tomato cheese 'bruschetta'!
Thick slice (at least 1" thick) the spent grain bread, top with swiss or provolone cheese, and add sliced tomatoes fresh from the garden. Broil for approx. 3 minutes. MMMMMMM!
All we have left now is half of one loaf of bread. :0)
Sunday, September 16, 2012
Ugly Pickles
This week, I made the last of the cukes from this year's garden into about the ugliest dill pickles you will ever see. Ugly, because end of the season cukes have the tendency to not grow straight and cylindrical, but rather to twist and contort and have one end fatter than the other. Maybe it's the cooler nights that do it? Or maybe the dying vines just can't make normal fruit anymore? Whatever the reason, I now have two quart jars of strange looking pickles. Good thing taste counts for more than looks, when it comes to pickles; these two quarts will get eaten just as readily as the pickles that look more like what you'd find on the shelves of the grocery store.
Beauty aside, these ugly pickles are a huge savings from pickles purchased at the store. Considering that the cucumbers, dill, and garlic I used were homegrown (basically free), my only expense was the vinegar, canning salt, celery seed, and mustard seed that went into each jar. Those are pretty cheap, making each quart jar of pickles cost just a small fraction of a jar of dill pickles from the store.
I'm pretty happy with my cukes this season. It's been years since I was able to grow enough cucumbers to make pickles with. My tally in the cellar this afternoon is 11 pints of hamburger dills, 6 quarts of dill spears (I use the ones that get away from me and get fat to quarter into spears, saving the smaller cukes for whole dills), and 15 quarts 1 pint of whole dill pickles. :0)
Beauty aside, these ugly pickles are a huge savings from pickles purchased at the store. Considering that the cucumbers, dill, and garlic I used were homegrown (basically free), my only expense was the vinegar, canning salt, celery seed, and mustard seed that went into each jar. Those are pretty cheap, making each quart jar of pickles cost just a small fraction of a jar of dill pickles from the store.
I'm pretty happy with my cukes this season. It's been years since I was able to grow enough cucumbers to make pickles with. My tally in the cellar this afternoon is 11 pints of hamburger dills, 6 quarts of dill spears (I use the ones that get away from me and get fat to quarter into spears, saving the smaller cukes for whole dills), and 15 quarts 1 pint of whole dill pickles. :0)
Friday, September 14, 2012
Using Leftover Pork
Back in June, when we held DD1's graduation open house, I talked about how we roast a pig for each of our children's open houses. I mentioned that there is always leftover--mainly because Mother-in-Law raises the pig for us, and she doesn't quite get "it only needs to be about 120 pounds", so we usually end up with a porker that was 250-300 pounds on the hoof. That's a lot of pork for one meal, even if you are feeding 100 guests!
None of the leftover roast pork goes to waste, however. We put it all in freezer bags, send some home with relatives and friends, and put the rest in our own freezer to enjoy throughout the next several months.
Well, now that there is just one child left at home, I've made an important discovery: a gallon of pork only stays good so long once you thaw it. Used to be I could take a gallon bag of pork out of the freezer, and three days later it would be all gone. Not any more. Especially with DH traveling more frequently for work.
Late last week, I thawed a bag of pork, thinking it sounded good since we hadn't had any in over a month. And it was, at first. For the first two days, the three of us had pork for dinner and pork sandwiches for lunch. Then DH had to go out of town. Suddenly I was looking at trying to finish a half-gallon of pork between just two of us!! No way was I about to waste good food by letting it spoil in the fridge.
DD2 was all ready on the verge of pork burnout, and I was approaching that stage myself. So, it was time to get creative. I started experimenting with our roasted pork. BBQ pork over boiled potatoes, and pulled pork sandwiches weren't going to cut it; we'd all ready eaten them too recently. I had to branch out and try coming up with something new featuring leftover pork.
I'll share the two best recipes I came up with.
Roast Pork Quesadillas
For each quesadilla you will need
It was just 'pork and beans', but man, was it delicious!
So, there you (and I!) have it. Two new ways to use up leftover pork.
None of the leftover roast pork goes to waste, however. We put it all in freezer bags, send some home with relatives and friends, and put the rest in our own freezer to enjoy throughout the next several months.
Well, now that there is just one child left at home, I've made an important discovery: a gallon of pork only stays good so long once you thaw it. Used to be I could take a gallon bag of pork out of the freezer, and three days later it would be all gone. Not any more. Especially with DH traveling more frequently for work.
Late last week, I thawed a bag of pork, thinking it sounded good since we hadn't had any in over a month. And it was, at first. For the first two days, the three of us had pork for dinner and pork sandwiches for lunch. Then DH had to go out of town. Suddenly I was looking at trying to finish a half-gallon of pork between just two of us!! No way was I about to waste good food by letting it spoil in the fridge.
DD2 was all ready on the verge of pork burnout, and I was approaching that stage myself. So, it was time to get creative. I started experimenting with our roasted pork. BBQ pork over boiled potatoes, and pulled pork sandwiches weren't going to cut it; we'd all ready eaten them too recently. I had to branch out and try coming up with something new featuring leftover pork.
I'll share the two best recipes I came up with.
Roast Pork Quesadillas
For each quesadilla you will need
- two large tortillas
- some roast pork
- shredded colby jack cheese
- salsa
This is an easy one to make. It's pretty much all by feel, so heap as much on as you want. Heat your oven to 400 degrees. Put one tortilla on a cookie sheet or pizza pan. Top with shredded roast pork, as thick as you wish. Cover pork with shredded cheese. Top the cheese with salsa. Then place the remaining tortilla on top. Cook for 8-10 minutes, longer for really thick quesadillas, shorter for thinner ones. When the top tortilla starts to brown on the edges, should be hot enough in the center to be done.
Not Your Mama's Pork and Beans
The inspiration for this one came from my current abundance of green beans in the garden, and thinking that if green beans cooked with a ham taste really good (they do! If you've never tried it, next time you bake a smoked ham, pour a can of green beans into the pan the last 1/2 hour of cooking. MMMM, ham beans!), maybe beans cooked with smoky roast pork would taste good too.
Here's what I did:
- topped, tailed, and snapped the quantity of green beans I wanted to serve.
- cooked them in my steamer until they were tender
- put about 1/2 inch of water into my 8" skillet
- added the amount of leftover pork I wanted
- sprinkled the pork with some of the Pig Rub you can find the recipe for in my post on June 11th "Life Goes On"
- stirred my steamed beans into the pork
- put a lid on the skillet, and simmered the whole thing about 20 minutes.
It was just 'pork and beans', but man, was it delicious!
So, there you (and I!) have it. Two new ways to use up leftover pork.
Wednesday, September 12, 2012
The Junk Man Cometh
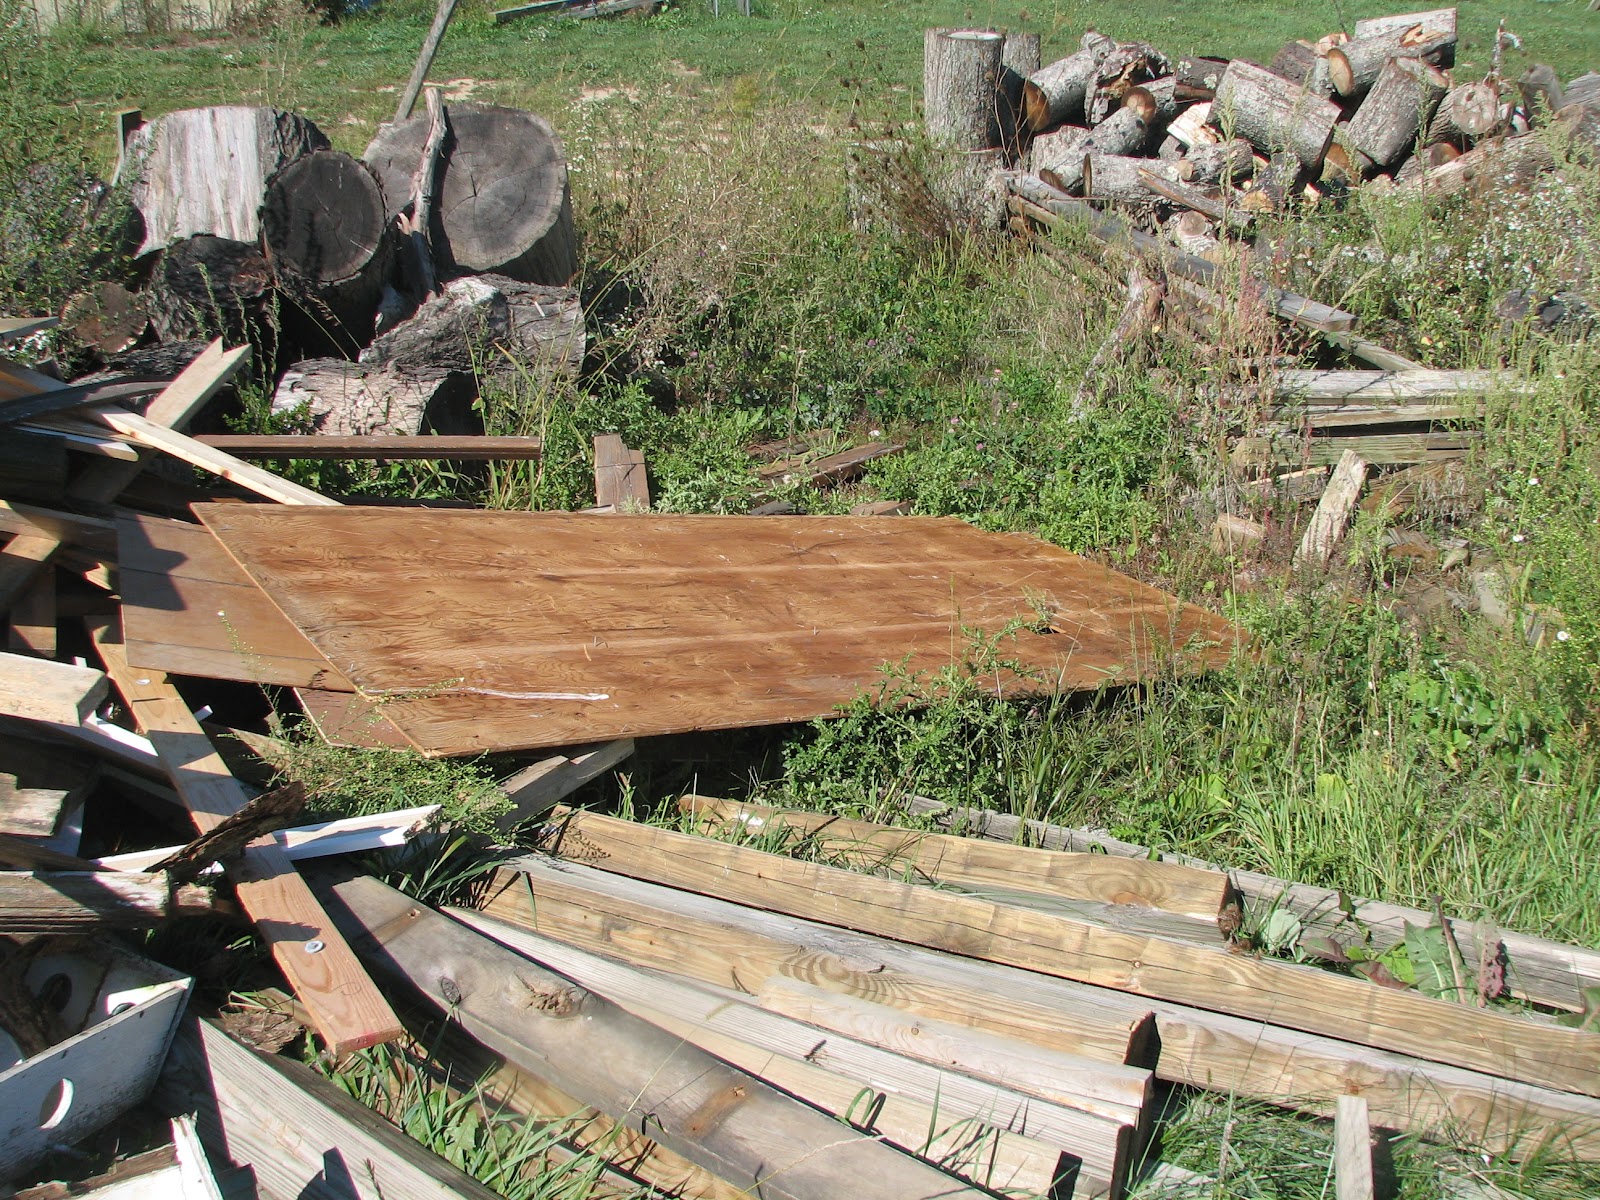
Our friend with the junk hauling business caught us after church last Sunday and said he had another load of useful stuff, with a lot of 4" x 4" lumber, if we were interested in it. Imagining what he could use those 4-by-4's for, DH said bring it on!
It took him a few days, but the junk man came, and dropped a load of scrap wood.
Looks like a pile of junk, but wait! Look closer. There's a usable door that would be great for my future garden shed.
There's some split rail fence pieces, both rails and posts, that appear to be in good shape. Aged, but not rotten. Have to wait until we sort through the pile to know how many there are and if that will be enough to maybe put up a decorative fence somewhere.
Peering around some more, I was excited to spot pieces of a martin house. I've wanted a martin house for a long time, and from what I can tell so far, the pieces are still intact, just disassembled. So hopefully DH and I can put it back together this winter and find a pole to put it up on. All flying bug eaters are welcome here.
Another cool find is several landscape timbers. I can't wait to dig into the pile and see just how many there are. Landscape timbers are handy things. You can not only do landscaping with them, they also make great trot poles for working horses over. :o)
Along with the big stuff like the 4 by 4's, the door, the martin house, the landscape timbers, the split rail fence, I spotted some other stuff that has potential for re-use. Like spikes (aka really big long nails):
and electric fence insulators:
big old hinges:
a number of 1" x 10" white spruce boards:
as well as pieces of paneling that would be useful for building deer blinds:
What was someone else's worthless trash last week has taken on a Christmas present-like persona this week at this little place here. As the saying goes, one man's trash is another man's treasure. We get excited when the junk man cometh!
Monday, September 10, 2012
Foggy Mornings
That's what we've been having at this little place here. Fall is in the air, even if the mid-afternoon temperature is in the upper 80's. Mornings have been cool and foggy more often than not.
The garden is still going strong, I can't keep up with the harvesting, canning, and weeding too. But now there is an urgency, the cool nights and morning fogs say that all this production will come to an end soon. About three weeks from now is when we usually get a couple of hard frosts that put the beans, peppers, tomatoes and other heat-lovers in their graves. For now, I have to buckle down, and preserve as much as I can before the cool weather comes. In the winter, I'll appreciate the abundance of the season; right now I'm too busy!
Tuesday, September 4, 2012
What I Did on Labor Day
Most people, I think, spend Labor Day either picnicking with friends and family, or just hanging out at home relaxing and enjoying their day off from work.
At this little place here, we're not most people. A day off from our normal (ie. paying) jobs, means a day to work at home. Here's what DH and I did yesterday:
We took the one and a half bushels of Roma tomatoes that were ripe in our garden, (raised organically, at least, as organic as you can get without Uncle Sam's expensive seal of approval) and cooked them down into tomato sauce. Thirty-five pints of sauce.
And how long, you ask, does it take to make one and a half bushels of tomatoes into thirty five pints of tomato sauce? Well, in my kitchen, with three large pots on the stove (because I couldn't fit more) and two canners going (once I could take two of the three big pots off) it took eleven and a half hours.
Labor Day? Yes, we labored. And now all winter long we can enjoy the fruits, or should I say, sauce, of our labor.
At this little place here, we're not most people. A day off from our normal (ie. paying) jobs, means a day to work at home. Here's what DH and I did yesterday:
We took the one and a half bushels of Roma tomatoes that were ripe in our garden, (raised organically, at least, as organic as you can get without Uncle Sam's expensive seal of approval) and cooked them down into tomato sauce. Thirty-five pints of sauce.
And how long, you ask, does it take to make one and a half bushels of tomatoes into thirty five pints of tomato sauce? Well, in my kitchen, with three large pots on the stove (because I couldn't fit more) and two canners going (once I could take two of the three big pots off) it took eleven and a half hours.
Labor Day? Yes, we labored. And now all winter long we can enjoy the fruits, or should I say, sauce, of our labor.
Subscribe to:
Posts (Atom)