Showing posts with label recipes. Show all posts

Tuesday, July 15, 2025

Apparently I'm the Weird One

 Indulge me in a funny little story, and I'll give you a 'custom' recipe at the end.  

Last weekend, I got a text from DD2.  (Which reminds me, I should do an update on DD2--big positive things have happened to her this year!)  She asked for my no bake cookie recipe saying "I thought I had it written down, but I can't find it anywhere.  And none of the ones online have coconut in them."

To which I replied "That's because coconut in no bakes is something I started doing many years ago at your Dad's request."

Then I told her that the coconut came from DH's fond memory of his childhood friend's (the friend with the appliance/home furnishings store at which we buy all our household brand-new big stuff) mother's no bake cookies.  Only she called them 'haystacks' and used no cocoa powder, but lots of peanut butter and coconut in them.  As an adult, DH had lost his fondness for peanut butter, and asked me once upon a time to add coconut to my regular no bake cookie recipe. (side note: all the haystack recipes I've seen use chow mien noodles, but DH insists these haystacks did NOT have chow mien noodles only oats.)

So, every time since then (looking back, I realized it had been definitely more than 22 years, and since DD2 is only 27, she doesn't remember any other way) I have put coconut in my no bake cookies unless we are out of coconut.  And since it's long been my goal to never run out of pantry staples, it's been pretty rarely that I've made 'normal' no bake cookies in this century.

DD2 then texted me back: "I can't believe the coconut is just a Dad preference.  I always thought that was normal for no bakes and have argued the point with friends before because no bakes without coconut are weird to me. But apparently I'm the weird one here."

Which gave us both a good laugh.  But, if you think about it, this is a great example of how our belief system is shaped by what we experience as kids. What we consider normal versus abnormal or weird.

I did let her know how much coconut to put in a to-everyone-but-her normal recipe for no bakes.  She made them for her new housemates and guests (they were having a moving in party), all of whom thought they were the neatest take on no bake cookies ever.  


Here's *my* (and DD2's!) no bake cookie recipe:

2 cups sugar

1 stick of butter (1/2 cup)

1/2 cup milk

pinch of salt

1 tsp vanilla

1/2 cup cocoa powder

3/4 cup creamy peanut butter

1/2 cup shredded coconut*

3 cups rolled oats (or quick oats, if you prefer less 'meaty'/chewy cookies


Top a cooling rack (or two if you don't have a large cooling rack) with waxed paper.

Put the first four ingredients in a medium-large saucepan, and heat over medium heat, stirring occasionally, until butter is melted and the mixture comes to a boil.  Boil and stir one minute.

Shut off burner, and stir in vanilla. Then stir in cocoa and peanut butter until the peanut butter is melted and mixture is smooth.  Add the coconut and oats, stirring until completely combined with the hot ingredients.

Using a large table spoon (like you'd eat with), place cookie mixture by spoonfuls onto the waxed paper.  Let sit until firm and cool.

 * if I'm a little short on oats, I add more coconut to make up the difference.  This helps keep the cookies from being too runny, yet I can still make a batch rather than miss out for want of a half-cup or less of oats.

Thursday, May 8, 2025

Cherry Clafouti

 Recently, I tried my hand at making a cherry clafouti.  I'd never made one, never even tasted one before, but it was something that had been on my radar for a number of years.  A few weeks ago, after learning that I have a tart cherry tree, someone asked me if I'd ever tried making a cherry clafouti with my cherries.

"No," I answered, feeling a bit guilty that I'd never made use of them that way even though I'd heard of it more than a decade ago (best laid plans of mice and men sort of thing).

About two weeks later, I was in the chest freezer retrieving some meat to restock the kitchen fridge's freezer, and I noticed that I had a bag of frozen cherries from the 2023 crop still.  According to the label, it was 3 cups of pitted tart cherries.

Well, that sealed it.  Time to try cherry clafouti.  So I took that bag of cherries upstairs to the kitchen and thawed it overnight.  Meanwhile, I looked up a likely sounding recipe using tart, not sweet, cherries--I actually have a recipe for one using sweet cherries but I've never been confident enough to translate the needed sugar amount to make it tasty with tart cherries.  Then I made a plan for breakfast the following morning.

I confess, I was a bit nervous not knowing how this clafouti would turn out.  Even if it turned out exactly as the recipe described (I was using thawed cherries rather than fresh ones that the recipe called for, and a slightly larger amount), would I even like it?  It's technically an egg dish, and eggs are something I either love or hate, depending on how they're cooked and the resultant texture.


So, how did it come out?  Did I like it?  Will I ever make another clafouti again?


It was delicious!  Definitely a recipe success!  Even though DH complained that it 'wasn't all that good', he ate a quarter of it.  Actually slightly more than a quarter, because, as you can see by the photo above, I cut it kind of off center.  Upon questioning, he said it wasn't great because he likes meat with his breakfast, and it wasn't meat.  Ugh. Hello, macho man, eggs are meat.

Myself, I ate the other quarter! I loved not only the flavor, but the texture was spot on for the acceptable egg dish category.  In fact, the texture reminded me very much of my favorite dish I would get when we would travel to the Upper Peninsula and go out for breakfast at a little local cafe (that unfortunately, isn't there anymore as it closed down a few years ago).  

This recipe is most definitely a keeper.  In fact, I'm thinking that with a reduction of the sugar, it would probably also be excellent made with blackberries.  I will have to remember to try that in August, when the blackberries are in season (out in the woods and in a corner of our field).

I do have to say, it was awesome fresh and warm.  Leftover the next day and reheated, it was still pretty good.  The third day, when I finished off the last piece, it had gotten pretty rubbery.  So, in the future, definitely eat it all right away, LOL.


Since I followed an online recipe pretty much exactly (except my cherries were pitted and thawed), I'm not going to type it out here.  I will just post a link to the original site that I got it from.

Cherry Clafouti

Thursday, April 17, 2025

The Ugly Biscuit

 This is actually a post I'd intended to write years and years ago.  According to my drafts folder here, I wrote out the title (and didn't type any body) back in the Fall of 2020.  At the time I had made biscuits earlier in the day, was reminded of what my kids always called the last biscuit made in the batch, and thought I'd compose a post in regards to that.

So, life happened, the post didn't get written, and here we are in Spring of 2025.  I made biscuits and gravy for breakfast the other day, ate the Ugly Biscuit, and remembered this intended post of long ago.  

Indulge me in a bit of nostalgia, and I'll include my biscuits and gravy recipe, LOL.

For decades (3+ decades,) I have made biscuits from scratch.  And no matter how many times I've made the same recipe, I can never quite get it to come out with all biscuits the exact same diameter and thickness.  Being that I use a biscuit cutter, they are all uniform size/diameter until I get to the last bit of dough.  

But that last one?  It's typically hand shaped because it's a tad too little dough to roll to the same thickness as the others and be big enough around to use my cutter on. Or, sometimes, that last chunk of dough would roll and make a biscuit, but that would leave some dough around the edges that wasn't enough to make smaller biscuit that's big enough to not burn while cooking but if stuffed into the biscuit cutter with the just cut biscuit would make that biscuit too thick to cook all the way through in the same time as the others on the pan, so I just free form a slightly bigger around biscuit with my hands. Or, sometimes I can take the remaining amount of dough and gently pat it into the biscuit cutter so it is perfectly round and not too thick, but being that it was patted and not rolled, the top isn't smooth like the others.  

Thickness is important, so it cooks evenly and for the same amount of time as the other biscuits on the pan.  Diameter is not as essential. And so, in any pan of biscuits I make, there's always one a little smaller or a little lumpier or a hair larger around than the rest.

That's the Ugly Biscuit.  Probably not a politically correct term, possibly a biscuit body-shaming phrase, but there it is.

Somewhere along the way, one of my kids dubbed that runty or bigger or less-than-smooth (or both!) biscuit as the Ugly Biscuit.  The other kids (and DH) picked up on the moniker, and so forevermore, in every batch of biscuits I make, there is always an Ugly Biscuit.  

It cooks fine.  It has the same yummy texture as the rest of the biscuits.  It tastes just like the other biscuits.  But it's not the other biscuits.  It's the Ugly Biscuit.  And therefore it's special (and we must fight over it, LOL!)


Biscuits and Gravy

For the biscuits:
combine 2 cups all purpose flour with:
1/4 cup lard (or shortening)
1 Tbsp sugar
1 Tbsp baking powder
1 tsp salt 
until all the lard/shortening is mixed in.  
Then add 3/4 cup milk and stir until a soft dough forms.  If sticky, add a little more flour.
Knead on a lightly floured surface 20-30 times.  Then roll out 1/2" thick and cut with a biscuit cutter (mine is not quite 3" around; you can also use an inverted glass of same diameter).  Place on ungreased cookie sheet.
Bake in 450 degree oven for 10-12 minutes until golden brown.

Meanwhile. . . make the gravy.  I usually get to the part of the biscuit recipe where all ingredients but milk are combined, and stick my pork sausage in a pan to brown while I do the rest of the biscuit recipe.

Sausage gravy:
1 pound pork breakfast sausage, crumbled into a skilled and cooked over medium heat until brown.  DO NOT DRAIN!!!

Then add 1 stick (1/2 cup) butter and heat until butter is melted.
Then stir in 1/2 cup flour, and about 1 cup of milk until the milk and flour are combined. 

Slowly add more milk, lots of milk.  I'd estimate 2-3 more cups of milk. I confess I don't measure it, I just add some, stir in, add some more until it's a certain depth in my pan which I know will cook down to the thickness I want.   

Season with salt and pepper to taste, and stir until it comes to a boil.  Then turn heat to medium-low and let simmer, stirring occasionally until it thickens to the desired texture.  Typically if I pop the biscuits in the oven just before adding the milk to the sausage mixture, the gravy is thickened and ready about the same time the biscuits are done cooking.


Friday, April 4, 2025

Soggy Morning

The forecast for Wednesday was WET with a good possibility of strong storms in the evening hours depending on if the sun ever came out that day and how much the temperature rose. 

Morning was definitely spot on; with pouring rain and thunder rumbling like the sound of a tractor pulling an empty gravity wagon back and forth on the road in front of my house.  Horses were going to have to stay in the barn, as the air temperature was hovering just above the freezing mark and it was going to be impossible to put the horses outside without them getting drenched to the skin in the rain.  I didn't want anyone to get chilled.

So, rather than turning them out after their breakfast had been eaten, I decided I would stay in the house and do some house chores in the morning, then go to the barn after lunch and (hopefully) turnout horses during the break in the rain we were supposed to get midday.  It's always easier to clean stalls while the horses are outside, so I just flip-flopped my typical stalls-in-the-morning, house-in-the-afternoon schedule.

DH had been hinting on Tuesday about wanting some macadamia nut cookies, and this rainy morning was a perfect time to make some.  Thankfully, Tuesday I had planned ahead and taken a stick of butter out of the fridge to warm up and soften.

The first step in making the cookies was to gather the ingredients.  So, I began by retrieving that stick of butter from the barn-shaped cookie jar on the counter.

"What?!?" you say.  Butter in the cookie jar? Huh?

Yeah, when I want to set out a stick of butter to soften, I've learned to put it in the barn cookie jar (which, as my overflow cookie jar, rarely gets used because I don't often make double batches of cookies since the kids grew up and moved to houses of their own).  Otherwise The Yarn Thief will jump up on the counter, no matter which counter I put the butter on (or try to hide it under a dish towel), and lick/eat it.  She didn't used to jump on counters at all, but in the last handful of years she has developed the bad habit of doing it when I'm outside, or at night when DH and I are sleeping.  Always when there's nobody nearby to discipline her for it.

Getting the container of macadamia nuts out of the pantry, I looked at the level of the contents and suspected I was going to be short on the needed amount of nuts.  Bummer.  What could I sub in for the lacking macadamias?  

Walnuts!  Walnuts I have plenty of on hand, and they sounded like they would go well with macadamia nuts and white chocolate chips.  So I altered my recipe a tad and made Macadamia Walnut Cookies instead.

In the process of making the cookie dough, I used up the last of the vanilla in the little bottle I use for measuring out of when cooking and baking.  And, oops, the cabinet where I keep my steeping jar of vanilla revealed that I forgot to start another batch a month or so ago when I bought the vodka to use to soak vanilla beans in thus making vanilla extract.

Well, while the cookies were baking, I would just make use of that time to get another jar of vanilla beans steeping.  And, heck, while I was at it, and because the bottle of vodka is enough to make two batches of vanilla and I had plenty of vanilla beans on hand, why not just get two jars going?

Which is how I, all by myself, went through an entire bottle of vodka that morning.  I'm practically a teetotaler, so DH of course had to tease me about that empty bottle sitting on the kitchen island. . . 


The sun never did come out on Wednesday, although the rain stopped for a couple of hours.  It resumed again around 8:00 p.m. in the form of thunderstorms and kept up most of the night.  Based on how much fuller the horses' water trough were Thursday morning than on Tuesday evening when horses last had access to them, I'm guessing we got somewhere in the range of 5-6 inches of rain in about 36 hours.

Macadamia Walnut Cookies

(For macadamia nut cookies I use the basic Nestle Tollhouse chocolate chip recipe, but instead of chocolate chips I use white chocolate chips and add 1 cup macadamia nuts.)

1/2 cup (1 stick) butter, softened

1/2 cup shortening or lard (I use lard since I'm very sensitive to soy as I get older and soy is now in just about all brands of shortening)

3/4 cup brown sugar

3/4 cup white (granulated) sugar

2 eggs

1 tsp vanilla extract

2 1/4 cup all purpose flour (I use unbleached)

1 tsp baking soda

1 tsp salt

1 cup white chocolate (vanilla) chips

1/2 cup chopped mac nuts 

1/2 cup chopped walnuts


Mix together sugars, butter and shortening/lard until creamy.  Stir in the eggs and vanilla.  Add in the flour, baking soda and salt, then stir until combined.  Next add the nuts and white chocolate chips and stir enough to evenly distribute through dough.  Place on to ungreased cookie sheets by rounded spoonfuls.

Bake at 375 degrees for approx. 9-11 min until edges are browned. (Baking time varies by oven; my old one was 10-11 minutes, the newer one seems to get it done in 9 minutes.)  Remove from cookie sheets and cool on wire racks.

Monday, March 31, 2025

Yeehaw, Hang on to Your Hats!

 We had quite a storm blow through yesterday evening.  Not unexpected at all, in fact, it hit just about the exact time the meteorologists had been predicting for two days.  So we were ready for it.

As dinner was cooking in the oven (Husband's Delight, I'll put the recipe at the bottom of this post), I ran out to the barn and put evening feed in the horse's stalls, anticipating that I would need to bring them in a little early.

Ran back to the house as the timer on the oven was just finishing up.  DH and I sat down to salad and Husband's Delight, me keeping an eye on the darkening sky to the south.  

I gulped down the last few bites on my plate, then jumped up and headed out to the barn.  Just as I got there, my phone went off in a tornado warning alert.  Of course it said to seek shelter immediately, to which I replied (yes, out loud) "I will, just as soon as I get horses in." Because that's how it works when you have a farm.  Livestock first, then yourself.

I was to the mares' pasture gate (as the Poetess is always the first horse to come in--alpha mare that she is), where both mares were standing to meet me, when I heard the storm sirens in the village (6+ miles away) go off.  And then the wind kicked up.  Oh boy, here we go!

DH met me part of the way to the barn and took the Poetess from me so I could run back and get the LBM.  By the time I got to the same spot with her, he met me again with both of the geldings' halters.  I went to the their pasture, and quickly haltered one, pulled him through the gate and DH was back again, ready to receive the lead rope.  The last horse was anxious to get in by then, looking worriedly off to the south and waiting practically smashed at the gate for me to come in and grab him.

We got all the horses in their stalls and the barn shut up tight, then speed walked into the wind back to the house.  I had just pulled my muck boots off in the garage and decided (fool that I am for a good storm), to head out onto the front porch in my stocking feet to watch the front roll in, when it hit.

And man, did it hit good!  Straight line winds right out of the south and driving rain coming completely sideways.  Forget going on the front porch, it was like walking into a firehose!  So I went into the house instead, just in time to see (through the kitchen windows) the little side table go scooting across the entire length of the front porch (about 30') driven by the wind.  

Looking out the other windows, you couldn't see hardly anything the rain and wind were coming so hard.  I did notice that we were missing the little plastic toddler sized playset that sits in the backyard closest to the house.  It had been in the yard a few minutes ago, when DH and I entered the garage, but now it was missing.

The electricity blinked off and back on twice, then went off for good.  As of this writing (over 17 hours later), it is still off.  

About fifteen minutes after it hit, the leading edge of the storm had passed and the wind let up enough that we could see through the rain, I located that playset.  In pieces, starting out near the chicken coop and ending towards the field, about 50 yards from where it had originally sat.

playset pieces scattered from the backyard to the shop


Later, once the wind had died off and the rain slowed to a drizzle, DH and I went out to check on the horses and chickens (stubborn chickens had not wanted to go into their coop before the storm), and to assess damages.

Horses, horse barn and fencing: Fine.

Chickens and coop: Fine (all chickens huddled on their roost by then, LOL).

DH's shop: lots of water inside because the south facing door had been damaged by the wind hitting it full force.  South door has a huge dent and was raised about 10" by the force, and the east facing door is bent outward from the pressure inside the building.  We're going to have to put in our first ever claim on our homeowner's insurance.


House: lost a long piece of fascia of  the peak of the South gable.  Also several pieces of soffit partially ripped off on the front porch and the piece of soffit closest the door that goes from the garage to the front porch is all mangled and punched up into the garage attic (again, extreme air pressure).  A window screen ripped off a living room window is bent up and seems to have a piece of the window edging itself still attached.  Add that to the insurance claim.  A wooden chair that lives on the front porch was thrown up against the railing by the wind so hard that the backrest broke off.  All other porch/deck/patio furniture moved around, some flipped, but nothing else damaged.


Shed and garden/grape arbor: Fine

Trees: all the trees around the house and yard look fine, including the dead one leaning towards the utility pole that the electric company was supposed to have their contractor remove last Fall. In the northeast corner of the field, near the entrance to the 'north road' in our woods, a very large, tall, tree has the top completely broken out of it.  We'll have to examine it close up to determine if we need to take the entire tree down or let it be and see if it recovers.


This morning, the temperature is almost 40 degrees cooler than it was yesterday, with winds now coming from the north.  We have the generator on at the house so DH can have internet to work from home, and we have heat, lights, water, and the fridges and freezers can stay cool. We'll run the generator all day (or until the power is restored) then shut it off at bedtime to save fuel and have quiet for sleeping.  

There's no power in the barn though, so I strapped on my handy headlamp and cleaned stalls by its meager light.

selfie with headlamp


not the greatest stall cleaning light, but it does the job
(note shadow from my phone while taking the picture!)


HUSBAND'S DELIGHT

(recipe originally found in a magazine by my aunt in the early 1980's)

1 pound ground beef

6 ounces sour cream

3 ounces cream cheese

1/4 tsp garlic powder

1/2 tsp salt

1 Tbsp sugar

15 ounce can tomato sauce

1/2 cup chopped onion

10 ounces wide egg noodles

1 cup shredded mozzarella cheese


1. Set cream cheese out in a small bowl to soften for an hour (or soften on warm setting of microwave)

2. Cook ground beef and onion until meat is browned.  Meanwhile, cook the egg noodles until tender.

3. To the meat and onion, add seasonings and tomato sauce.

4. Drain noodles.

5. Add sour cream to the softened cream cheese and mix well.

6. In a greased 9" x 13" baking dish, layer half the noodles, then half the meat sauce, then half the cream sauce.  Then layer remaining meat sauce, remaining cream sauce, and remaining noodles.  Top with the shredded mozzarella.

7. Cover dish with foil and bake in a 350 degree oven for 30 minutes.

Saturday, October 21, 2023

Strawberry Cream Cheese Coffee Cake

 It's been ages since I posted a recipe on here. Clicking on that category, apparently it's been more than 5 years(!!) since I posted a recipe.  Waaaay too long.  I still cook, every day, from scratch, but somewhere a few years ago I lost my cooking mojo and it has been a chore rather than a fun thing.  So much so that when I list how many hours in a day I do 'work' at home, I include cooking time in the same way as washing dishes or doing laundry or mopping the floors or cleaning the bathroom.  You know, the chores.  Not the fun and relaxing stuff like reading, sewing, knitting, picking flowers to bring inside to make things pretty. . .

Every now and then I do feel a little adventurous in the kitchen, and I have added some new things to my cooking repertoire, but not like it used to be.  This recipe that I'm about to share isn't actually new.  It's really one I've had for years, but haven't actually made in several years for some reason.

Recently, however, I got the hankering for a strawberry cream cheese coffee cake.  Totally not the right time of year, in Michigan, for strawberries.  But, thanks to preplanning while they were in season, I have a stash of them down in the chest freezer (along with cherries, blueberries, rhubarb. . .)  So I didn't have to tell myself "that sounds good, but it'll have to wait for June 2024 to get here before I can make it."  Nope, I grabbed a pre-measured baggie of sliced, frozen strawberries out of the freezer and made myself a yummy coffee cake!

The recipe is an adaptation of one for Blueberry Cream Cheese Coffee Cake from the 2005 edition of Taste of Home's Quick Cooking Annual Recipes.  I just swapped out strawberries for the blueberries.  It's also delicious with blueberries, and, if I remember next summer, I want to try it with mulberries too.

Strawberry Cream Cheese Coffee Cake

2/3 cups sugar

1/4 cup butter

1 egg

2 cups plus 2 Tbsp flour, divided

1/2 tsp baking powder

1/4 tsp salt

1/2  cup milk

1 cup fresh or frozen strawberries (don't thaw first if you're using frozen)

3 ounces cream cheese, cut in small cubes

Topping:

2 Tbsp sugar

2 Tbsp flour

1 Tbsp cold butter


In a medium to large size bowl, cream the sugar and butter.  Beat in the egg.

In a separate, small bowl, mix the 2 cups flour, baking powder and salt.

To the larger bowl with the creamed mixture, alternately add the dry ingredients and the milk, stirring well after each addition.

In the now empty small bowl, toss the strawberries in the 2 Tbsp flour.  Add the strawberries/flour and the cream cheese to the batter in the large bowl, and fold together. Pour into a greased 8" x 8" baking dish.

Mix the topping ingredients in the again empty small bowl (like how I'm not giving you 2 extra bowls to wash by reusing the small one?) until crumbly, then sprinkle over the batter in the baking dish.

Bake in a preheated 375-degree (F) oven for 40-45 minutes until cake tests done.  Let cool slightly, then eat!

I was actually in such anticipation of that first, warm, fruity bite, that I forgot to take a picture of the finished coffee cake.  I remembered much later, after it had cooled off and doesn't look quite as mouth watering.  That's one thing you can count on at this little place here: what you see is what things actually look like; there's no staged photos or perfectly cleaned/decorated settings.  It's life in it's hectic, messy glory. If I have a coffee cake sitting on my (stained by grape juice) kitchen island that I just remembered to take a picture of, you get a probably not perfectly lit picture of a coffee cake in it's pan (missing a quarter of the cake) on my stained island.  C'est la vie.


Monday, January 16, 2023

Some Frugal Things

 With prices jumping mightily in the past year, and some kitchen staples really skyrocketing lately, I thought it might be a good time for me to talk about some frugal things that I do.  Some of which I've been doing for so long that I don't even think about them as being frugal.

If you look at the sidebar to the right, there's a whole category for frugal things, but to save you sifting through almost 12 years of content, I'll highlight and direct link to a few.

I typically make my own bread.  Here's a post from way back when the blog was  new and I talked about how I make my bread.

Also make my own laundry soap.  That's been going on for over 20 years, and with the newer washing machines, I use even less soap per load than when I wrote the post.  (Just skimmed that post and apparently my photos disappeared.  Sorry for the lack of illustrations, but the info is all there.)

We don't go through nearly as much paper towels and other people do, apparently. I'd always bought them in large 8 packs, and didn't really keep track of how long they were lasting.  But I never ran out, at least not until when DS1 & family lived with us from late 2014 to early 2016.  When they moved out it became very apparent that DH and I don't use paper towels much; suddenly a roll of paper towel lasted over a month instead of barely (and sometimes not even) a week.  I wipe up lots of spills with washable towels or rags.  And the rags are either old t-shirts, cut up, or old bath- or hand towels that have gotten thin or ripped or otherwise retired from use in the bathroom.  If I'm wiping up really gross stuff, there's no guilt in tossing the rag into the trash; there's always more rags as things get worn out.  And when they're not gross, all rags just go into the laundry to be cleaned for reuse.

We do use tissues, although I prefer, if I'm having a really runny nose like from allergies or working outside, to just tuck a handkerchief into my pocket and use that.  It can hold a lot more than a tissue, is quickly made from fabric (some I all ready had), and is easy to toss into the washing machine with other laundry.  Here's a couple posts I did years ago on making handkerchiefs.

As far as cleaning solutions go, white vinegar is my cleans everything.  There's a spray bottle kept under the kitchen sink that is 50% white vinegar and 50% water.  I use it for not only counters and walls and doorknobs and switches, but also for windows and mirrors.  

With the cost of eggs being astronomical at the moment (and it's winter, so my hens are barely laying), I'm digging out my egg subsititute options to use in baking in order to save the actual eggs for breakfast omelets.

The vast majority of our meals are cooked from scratch.  Check out the recipes category for recipes that mostly do not use 'a box of this and a jar of that'.  Speaking of jars of that, I so rarely buy anything in a jar that I recently came to the end of my stash of commercial jars I'd saved for using as grease jars and had to beg an empty jar for DD1.  

We have a small tv antenna mounted in the attic and watch what comes over the air 'for free'.  We don't subscribe to cable, satellite or streaming tv services.  Occasionally I will borrow a dvd from the library if there is a movie we are interested in watching.

Speaking of library, I don't often buy books.  The vast majority of books I read are borrowed from the library at no cost (free, if you overlook the fact that funding the library comes out of our property taxes).  

That's just a quick off the top of my head list.  Like I mentioned earlier, check out the sidebar for more posts under the topic of frugal.  There are lots of things I forget not everyone does, just because they've been my lifestyle forever.

Thursday, July 26, 2018

Pickles


This appears to be a good cucumber year in my garden.  I planted several rows, as I typically do, hoping for enough productive plants to allow me to make at least a dozen quarts of dill pickles. This year, unlike most, the majority of the cukes I planted not only sprouted, but they grew.  Not only did they grow, but they have been prolifically blooming, with apparently awesome pollination rates based on the numbers of  pickle sized cucumbers I have been harvesting pretty much every other day for over a week and a half now.


Which means I've been canning pickles nearly every other day for more than 10 days now!  It takes more than a handful of cucumbers to fill a quart sized jar, so most canning batches have been in the two or three quart range.  After not picking cukes for three days straight, I did fill not just FIVE quart jars with dill pickles, but I also sliced the overly large cucumbers into rings that tallied up to 9 pints of hamburger dills.

So far I am totaling 13 quarts of dill pickles, plus those 9 pints of hamburger slices.  And the cucumbers are still coming!!  Thankfully the pickle recipe I use is pretty simple and quick, if you don't count the overnight soak in lime water and the three hours of soaking in fresh water after that.  After a few years of experimentation with different recipes, and a few adaptations of my own, this is the recipes I have come up with to make the flavor of dill pickles that my family likes:

Dill Pickles

freshly picked pickling cucumbers 3-5 inches in length
1/4 cup pickling lime
1/2 gallon water

Wash the cucumbers and remove the blossom from the end.  Put into a large non-metal bowl--metal will react with the lime.  (I use a plastic bowl, as the lime will leave an ugly but harmless film on glass). Mix the lime in to the water (be careful not to breathe in the lime; it's not good for your lungs) and pour over the cucumbers.  Make sure all the cucumbers can be submerged in the lime water; depending on how many cukes you have, you may need to mix up a bit more lime solution.

Let the cucumbers soak in the lime water overnight (or about 8-10 hours).  Drain off the water, rinse out the bowl, and rinse the cucumbers thoroughly to remove lime residue.  Then put the cucumbers back in the bowl, and cover with fresh, cold water.  Let soak 1 hour and repeat the drain-rinse-soak cycle twice more for a total of three hours of soaking in fresh water.


fresh water soak


Near the end of the third round of soaking, fill your water bath canner about 3/4 full and put it on the stove on high heat.  Also, in a separate large pan or pot, make a solution of

1 cup vinegar
1 cup water
1 Tablespoon pickling salt
1/2 teaspoon turmeric

for each quart jar of pickles you will be making.  (In other words, if I have enough pickles to fill 2 quarts I use 2 cups each of vinegar and water, 2 Tbsp salt and 1 tsp turmeric.  6 quarts would need 6 cups each vinegar and water, 6 Tbsp salt and 3 tsp turmeric).

Heat this mixture to boiling, then reduce heat and simmer for 15 minutes.

Meanwhile, into each quart jar put

2 heads dill
2 cloves of garlic, peeled
1 bay leaf
1 teaspoon mustard seeds
1/2 teaspoon celery seeds
as many cucumbers as you can stuff in the jar leaving 1/4 inch head space.

Let the filled jars sit in a sink of very hot water while your vinegar solution simmers.  Once the simmering time has been met, and the jars are warmed from being in the hot water, ladle the vinegar solution into the jars, removing air bubbles and leaving 1/4" head space.  Put on lids and rings, and load into your now boiling water bath canner.  Make sure jars are covered with at least one inch of water.  When canner resumes boiling, process your pickles for 15 minutes.  Remove from the canner, and let cool for at least 12 hours before testing seals.

To develop proper flavor, your pickles should age at least two weeks before eating.


Today is going to be another pickle making day; I picked 52 more little cukes yesterday afternoon.


Wednesday, March 14, 2018

Chainsaws and Sap-cicles

What guys do while their females are at a "Girl Party" aka bridal shower?

DH, DS1, DS2 and Toad hung out here during DD1's bridal shower on Sunday, although they (mostly) stayed outdoors.  None of them, except Toad, wanted to be in the house while it was full of women, and thankfully the weather cooperated enough that they could comfortably spend several hours outside.

Toad only wanted to be in the house because his sister was at the Girl Party, as K3 called it, where there would be games and snacks. To a 3 year old, games meant Old Maid, Hi-Ho Cherry-O, and Go Fish, which we definitely weren't playing at the shower.  But still, it took a little convincing to get him out of the house.

As soon as his Papa, aka DH, started up the four-wheeler, Toad was convinced that outside was better than inside.  He loves the four-wheeler.  He also loves the woods, which is where all the guys were headed.  Taking the wood hauler trailer, and the chainsaws, they were ready to be gone for hours.

Turned out that Toad much more enjoyed the woods.  He helped to stack wood (the smallest diameter pieces) as well as had fun throwing sticks out of the way.  And of course, with sap sort of running--Sunday was sunny but only in the 30's--DH took him to our little sugar bush area to see where Grandma is collecting sap.  Since it was so cold, and I hadn't had time to get out and empty sap jugs on Saturday or earlier in the day Sunday , there were more than a few icicles hanging from jugs that had overflowed.  DS2 broke some off, and introduced Toad to the joy of sucking on a sap-cicle.  Cold and just slightly sweet from the maple sap.

After returning from the woods, DH brought Toad into the house to use the bathroom, but didn't want him to try to join the Girl Party.  So he told Toad that they were going to sneak in, use the bathroom, and pilfer some of our snacks.  They were so stealthy that I didn't even know they'd been in the house until much later, after the shower was over and the guests went home.

While the shower was wrapping up, DH brought out of the garage a very small (young child sized) four-wheeler we'd been given last fall.  It was in need of minor repairs when it had come into our possession, and DH hadn't had much time to tinker with it.  DS1 and DS2 were more than happy to mess with it that afternoon, cleaning out the carb and checking connections everywhere.  They also drained out the old stale fuel, and put in fresh gas.  By the time the last guests left the shower, that little four-wheeler was running nicely.  Toad and K3 both had a chance to drive it slowly and carefully around the backyard a few times. 

After which Toad asked me if I'd seen him driving it, and then asked me if he could "eat another one of those square things".  Square things meaning the mint squares I'd made for the shower.  And that's how I found out he'd snuck into the Girl Party. :0)

Mint Squares
First Layer, mix together:
1 cup sugar
1 stick butter, softened
2 cups chocolate syrup (recipe here, or use Hershey's syrup)
2 cup flour
4 eggs

Bake in lightlygreased jelly roll pan (10"x15") or large cookie sheet with 1" lip for 20 minutes at 350 degrees.  Refrigerate until cool.

Second Layer, beat together:
4 cups powdered sugar
1 tsp peppermint extract
4 drops green food coloring (or as many drops as needed to get a nice shade of green)
4 Tablespoons milk
1 stick butter, softened

Spread onto first layer.  Refrigerate until set.

Third Layer, melt together:
12 ounces (1 1/2 cups) chocolate chips
1 stick butter

Stir until smooth and well combined, then spread on top of mint layer.  Refrigerate until cool.


Cut into 1.5-2" squares and put in air tight container. Store in fridge until serving time.


Saturday, February 17, 2018

Rutabaga, Anyone

Do you eat rutabagas?

I have to confess, until I was about 20, I never did.  Not sure if I'd even heard of a rutabaga. My introduction to the rutabaga was through my boss sharing a pasty with me one lunchtime.  I'd never had a pasty either, being as I'd lived the majority of my life in Michigan's Lower Peninsula, just having moved to the UP roughly four or five months previous, and pasties are a definitive Upper Peninsula thing.

That pasty (thanks, Art, for sharing), had been made by his wife, and was delicious.  Without that positive introduction, I probably wouldn't still be making pasties from scratch more than 26 years later.  And I know I definitely wouldn't be eating rutabagas, let alone growing them in my garden year after year.

Pasties are the main recipe I use rutabaga in. But, slowly, I have branched out a little and occasionally serve them mashed, or as part as a roasted root vegetable dish.  This year I have found (thanks to the recipe included in the 2018 Maine Potato Lady catalog), a tasty soup to use my rutabagas in.

My pasty recipe, I've already given here.

You can throw rutabaga and carrots into this dish instead of using all potatoes.

And, giving all credit to the 2018 edition of The Maine Potato Lady catalog, this is the recipe I used for the very tasty (especially as a leftover) soup using rutabaga.

1 pound bacon
1 medium onion, chopped
2-3 cloves garlic, chopped
4-5 cups scrubbed and cubed potatoes--about 2 pounds
2 cups rutabaga, peeled and cubed
water or chicken stock, enough to cover (I used chicken bouillon mixed with water)
1 teaspoon dried thyme or 1 branch fresh thyme
salt and pepper to taste
grated Romano or sliced Cheddar cheese for garnish

Cook the bacon in your soup pot just until it is crisp.  While the bacon is cooking, prepare the vegetables.  

Remove the bacon from the pot, drain, and set aside.  Remove all but 2-3 tablespoons of bacon fat from the pot, add the onion and garlic and saute just until translucent.  Add the potato and rutabaga, saute for 5 minutes, (I ended up adding back in an additional 2 tbsp of bacon fat with the potato and rutabaga), then add water or stock to cover.

If you are using fresh thyme, add it now.  Bring the soup to a boil, reduce heat, then cover and simmer for 20 minutes or until the rutabagas are tender.  Stir occasionally, adding more water or stock as needed.  Cut up the bacon into large pieces. When the rutabagas and potatoes are tender, add the bacon and (if using) dried thyme to the pot, season with salt and pepper to taste.  If you used fresh thyme, remove the branch.  Garnish with the Romano or Cheddar cheese.  Serve with hot cornbread (I had freshly made, buttered slices of wheat bread).  Serves 6 generously.

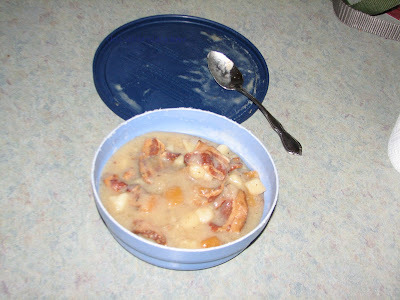
I forgot to get a picture of the soup until I was on the very last serving of leftovers


Thursday, April 13, 2017

Chive & Garlic Corn

This is one of the recipes I tried in March that both DH and I loved.  It's so good, a nice change from 'plain' frozen corn.  (If I can't can my own, I don't usually eat canned corn, but prefer to buy frozen corn). The recipe comes from Taste of Home's 2008 Quick Cooking Annual Recipes cookbook.  It calls for the frozen corn to be thawed before using, so I just dumped mine in a pan, added a little water, and heated it until the water began to steam.  Then I drained out the water, and continued as the recipe directs.

Chive 'n' Garlic Corn

1 package (16 oz) frozen corn, thawed
1/2 cup finely chopped onion
2 tablespoons butter
1/4 cup minced chives (mine were cut fresh from my chives planting, and 'minced' by snipping with my herb shears)
1/2 teaspoon minced garlic (I used 2 cloves, and put them through my garlic press)
1/8 teaspoon salt
pepper to taste

In a large skillet, saute corn and onion in butter for 5-7 minutes or until tender.  Stir in the chives, garlic, salt, and pepper.  Yield: 4 servings.


Quick to make, and what a nice way to dress up a commonly used vegetable.  I made a big batch of this and took it as my dish to pass to the church potluck on Palm Sunday.  It disappeared really fast.  By the time I got through the line, the dish was nearly empty, and DH didn't get any at all!


Monday, February 27, 2017

Mexican Duck

Earlier this month I tried a new recipe featuring duck. I had found a whole duck (raised a few summers ago) in the freezer  while reorganizing it. The chest freezer, like a number of places, had gotten horribly choatic with things just being stuffed into it willy-nilly when DS1 and family were living here.  So, with my normal freezer filing system thrown out the window for a couple of years now (because digging out from all the chaos and clutter has been a long --and still ongoing-- unpleasant process for me) I had forgotten about the small duck way down in one of the bottom baskets.

I let the duck thaw in the refrigerator (about a day), then put it into the crock pot on low for 7ish hours.  It was somewhere between 2.5 and 3 pounds, and since I really don't have a recipe for cooking a whole duck in the crock pot, I just winged it (ha ha) in terms of cooking time.  When it looked like the duck was ready to fall apart--legs separating from body and breast meat trying to fall off the keel bone--I took it out of the crock pot, deboned and shredded it.

After that I loosely followed a recipe for duck tinga that I had found on the internet.

Here is what my personalized version of the recipe turned out to be:

shredded duck meat
4 smallish potatoes, peeled and shredded
1/2 cup chopped onion
4 cloves garlic, minced
2 Tbsp olive oil
1 8oz. can chipotle peppers in adobo sauce
1 tsp oregano
2 cups water
1 avocado
sour cream
fajita size tortillas

With your hands, squeeze the water out of your shredded potatoes.  Heat a skillet on medium heat, then add oil, potatoes, onion and garlic. Cook, stirring occasionally, until the potatoes start to brown, roughly 15 minutes.

Add the oregano, duck, and adobo sauce.  Stir in the water, and let simmer until you are ready to serve dinner (can serve as soon as hot; I think mine simmered for about 45 min. waiting for DH to get home from work.)  Can simmer longer if runny, or add more water if it looks like it is getting too dry.  You want the mixture to be 'juicy' but not soupy.

Warm the tortillas (either covered in foil in 300 degree oven about 10 min, or one at a time in a hot frying pan--dry, no oil or butter--for roughly 30 seconds per side).  Remove skin and pit from avocado, and cut into thin slices.

To eat, place desired amounts of duck mixture, sour cream and avocado on a tortilla, fold and eat!


This was super spicy.  At least, I thought so, since I rarely eat anything above the level of a mild salsa.  But yet, I loved it.  Heaps of sour cream and avocado toned down the heat enough that I could eat a couple of these in a row.  DH wasn't so fond of it. In fact, he said that I didn't need to worry about making "Mexican duck" again in the future.  

Given that the only poultry currently in our freezer are chickens, turkeys and a previously forgotten goose (same year as the duck), I won't be making duck anything any time in the foreseeable future.  Wonder what kind of interesting goose recipes I can find. . . 


Monday, February 6, 2017

Garlic Chicken Calzones

A long time ago, more than nine years all ready, I ate the most delicious garlic chicken calzone.  It was at Coronado Brewing Company, on Coronado Island in California, when we went to San Diego for DS1's graduation from Marine Corps Boot Camp.  (On a side note; WOW I can't believe time has flown so quickly; it is now a couple weeks past the tenth anniversary of the day that he enlisted, halfway through his senior year of high school and at the tender age of 17--so young that DH and I had to sign his papers giving our permission for him to enlist. Talk about entrusting your child to the government . . .)

That calzone was so awesome, so delicious, so garlicky (and I do love garlic) that I have not forgotten it. Not only haven't I forgotten it, I've wanted another one for years.  But, alas, on my journeys since then (I haven't been back to California) I have not encountered another restaurant that serves a garlic chicken calzone.  Nor have I been able to find a copycat recipe for the ones served at Coronado Brewing.

Last week I went poking around the internet again, looking for a recipe that sounded like it would create the taste I remembered.  Locating one I thought was close enough that I could maybe fudge the rest, I gave it a try.

It came out pretty good, but a little drier and not as overwhelmingly garlicky as I remembered (even though I doubled the amount of garlic the original recipe called for.) Next time I think I might perhaps roast the garlic first, so it is more of a garlic paste, and also change the sauce a little, maybe into more of a cream sauce than a white sauce.  But, for now, here's what I came up with that's totally edible if not in-your-face garlic:

Garlic Chicken Calzones

2 boneless skinless chicken breasts
2 tsp creole seasoning 
2 Tbsp butter
1 Tbsp olive oil
8 cloves garlic, finely chopped
2 Tbsp flour
1/4 cup chicken broth (1/4 cup water + 1/4 tsp chicken bouillon)
3/4 cup milk
1/2 tsp salt
1/4 tsp pepper
3/4 tsp dried basil
1 1/2 cups shredded Monterrey Jack cheese
2 cups fresh spinach leaves, chopped
1 recipe pizza dough (my recipe here)

Sprinkle the creole seasoning evenly over the chicken breasts and let sit for 30 min to soak in.  Meanwhile, prepare the pizza dough.

While the pizza dough is rising, cook the chicken--

Broil chicken (I typically set my broiler for 450 degrees) for about 10 min per side until done.  (These were big thick breasts from a chicken that dressed to 6 pounds, thinner breasts might not take as long to cook).  

While the chicken is broiling, make the sauce--

In a sauce pan, melt butter and olive oil over medium heat. Add garlic and cook for 2 minutes, stirring occasionally so the garlic does not brown.  Add flour, salt and pepper; cook for 1-2 minutes stirring frequently.  Slowly add the chicken broth, then the milk while continuing to stir.  Add the basil and continue to cook until sauce thickens. Once thickened, remove from heat.

Dice the now cooked chicken and set aside.

Divide your (risen) pizza dough into six equal balls.  Using one ball at a time, roll into an 8" circle.  Spoon 1/6 sauce onto center of circle. Cover sauce with 1/6 each of chicken, spinach, and cheese.  Keep the filling about 1" away from edges of dough.  Fold into a half-moon, and roll edges (with fingers) to seal.

Place calzones onto a lightly greased baking sheet, and bake in 350 degree oven for 20-25 minutes until golden brown.  

While the calzones are cooking, clean up the kitchen and put away your flour, seasonings, etc.  Then set the table.  Once the calzones are done, call the family for dinner and enjoy!

Tuesday, January 31, 2017

Taste The Tater Rainbow

I've grown potatoes for years.  I'm not sure how many; I started gardening the summer I was pregnant with DD2 (so, 1997), and the garden grew and grew from there. I guess you could say this year will be my gardening 20th anniversary.

Potatoes may have been in that first garden, or they might not have shown up until a year or two later.  Point being, I'm pretty experienced at growing potatoes.

Potatoes are a staple of the American diet,  They can be boiled, baked, roasted, fried, mashed, scalloped. . . They are very versatile.  They also take fairly easily to seasoning.  And, in my opinion, they also taste decent raw.  A fond childhood memory is of eating, raw, the littlest potatoes from my grandparents' garden. Bite-sized snacks, as it were.

Despite this appreciation for, and experience with growing potatoes, it wasn't until a few years ago that I discovered fingering potatoes.  These skinny little potato morsels are awesome roasted.  A little oil, a little sea salt, your favorite herbs, a bit of time in a hot oven and you have something delicious to accompany just about any cut of meat.  Or, let's be truthful, as a nice hot snack on a winter's day.

Not only are they tasty and easy to prepare, they are easy to grow.  And prolific. I started with a few pounds of seed potatoes a couple of years ago, and I currently have over a bushel of the buggers--uh, I mean, fingering potatoes--still in my cellar from the 2016 harvest.  My 'normal' potatoes are just about gone; down to the amount I am zealously guarding as my seed stock for 2017, but I have lots and lots of fingerings left.

So far, I've grown three varieties of fingerings: Papa Cacho, Rose Finn Apple, and Yellow Finn.  A deep red skin with reddish flesh, a pale pink skin with white flesh, and a buttery yellow skin with yellow flesh.  Each with a slightly different flavor.

Last year, on impulse, I picked up a sad looking little bag of purple potato seed on clearance at the farm store.  I was quite surprised when those emaciated, unsprouted little potatoes actually grew after I planted them.  I don't remember the name now, but they are a very dark, almost black skinned little round potato with purple-streaked flesh.  I didn't get a huge yield of those (but then again, I had six 'seeds' to start with), and am saving about 75% for this year's seed.

A favorite dish this winter has become fingering and purple potatoes, mixed together into a potato rainbow of sorts, seasoned with rosemary, thyme, sea salt, garlic powder, black pepper and olive oil, and roasted in the oven until tender (roughly 40-45 min at about 400 degrees).


You know, once you get a taste of something other than your standard baking or mashing potato--the ones with the brown, white or red skins--and branch out into other potato types, it could become kind of an addiction.  I mean, not only do I have these four 'weird' varieties of potato in my cellar waiting to be planted in the Spring, I've also ordered a few more varieties to try this year.  What can I say?  Food doesn't have to be boring.  Nor does it have to be full of fat to be tasty.

Taste the tater rainbow.  You'll like it.


Sunday, October 23, 2016

How To Eat Venison

I would like to thank Kat, who commented on Monday's post and posed the question "What do you like to make with the venison?".  That comment, and question, made me realize that I am again doing what I often do, which is assume everyone is like me and lives like me and knows what I know, and therefore I'm not really doing a whole lot of describing of the things I do on a regular basis and take for granted.  Like eating venison.

So thanks, Kat, for commenting on that post and asking what you did.  You inspired this post.

Once upon a time, I didn't eat venison, wasn't around people who ate venison, and when I met DH and (eventually) he offered to cook me dinner, which was venison, it seemed like a strange and exotic food.  As the years went by, and we had land available to hunt on without traveling for hours to get there, venison became a staple in our diet.  To the point that I eat more venison than I do beef (which is saying a lot, since I love beef!).  And I forget that once upon a time, like most people, I had no idea what to do with a deer's worth of meat (anywhere from 40-80 pounds of meat, usually).

We process our own deer rather than send them somewhere else to be cut into tidy packages of meat ready for the freezer.  Through the years we've experimented with different ways of cutting the meat, but have realized there are some things we just aren't fond of.  Like venison soup, made with bones.  So we don't save those anymore.  Or venison roasts, which are kind of dry since venison is a very lean meat.  So we don't cut part of the deer into roasts.  What we do end up with are five 'kinds' of meat: steaks, stew meat, jerky meat, tenderloins & backstraps, and ground venison.

The largest muscles we cut into steaks. Typically these are the large ones in the hindquarters (more specifically, the muscles you would think of as the 'butt'). The smaller ones of the hindquarters and the larger shoulder muscles of the front quarters (plus the ends of the large muscles that would make too tiny of a steak), we cut into 1" chunks for stew.   Some long, tender strips of meat, (from anywhere on the deer) are set aside to be made into jerky. The 'outer loins', or backstraps, which are the two muscles that run along the left and right sides of the spinal column, are cut into half, giving us four good sized hunks of meat.  The 'inner loins', or tenderloins (the two muscles running along the 'bottom' side of the spinal column which is inside the rib cage of the deer) are usually the first things eaten after a deer is harvested--they never make it to the freezer. Tenderloins are the most awesome cut of venison you could ever eat. And everything else gets run through the meat grinder, twice (usually a coarse grind plate the first time, and a finer plate on the second grind) and made into venison burger.

What do I do with it from there?

Well, the tenderloins are so tender, and narrow, that we just cut them into 1" wide pieces and saute up with some onions and garlic and eat for breakfast.  A little salt and pepper before they go into the pan, and then you just stir them around until the onions are soft (and the loins are still pink inside).  You don't want your loins cooked well done because that makes them tough and chewy.

The backstraps are reserved for grilling.  In our house it is sacrilege to pan fry or bake a backstrap!  Like the tenderloins, you want them to be rare to medium rare for the best flavor and texture.  A loin cooked until it is brown all the way through is like eating leather.  No matter whether we are grilling the backstrap as a whole piece of meat, or cutting it into 'filet mignon', I like to season it liberally with garlic powder and onion powder, and then a lessor amount of pepper and seasoning salt, then let the spices soak into the meat for at least 30 minutes before grilling.

The steaks we typically pan fry; seasoning first with seasoning salt, pepper, onion powder and garlic powder, then coating lightly with flour and pounding (with the edge of a plate) on both sides to tenderize the meat.  You can use either olive oil or lots of butter in the frying pan to fry the meat in.  Either one tastes good.

Other than that, I use the venison exactly like you would cook any similar cut of beef.  Steaks can be cut into smaller chunks and used in shish kebabs.  Or substituted for beef in the round steak and brown gravy recipe my mom gave me decades ago:

3 pounds beef round steak (or similar amount of venison steak)
1/3 cup flour
3 Tbsp shortening
salt
pepper
1 tsp onion powder
1 can cream of mushroom soup
1/2 cup water

Cut the meat into serving size chunks (or, if the steaks are relatively small, leave them uncut), and sprinkle with salt and pepper.  Dust with the flour, then  pound meat (I use the edge of a plate). Flip the meat over, dust with the flour again, and pound at a 90 degree angle to how you pounded the first side.

In a skillet, melt the shortening over medium heat.  Add the meat, turning once to brown both side.  Mix soup, water, and onion powder in a mixing bowl, and pour over meat.  Simmer, covered, for approximately 1.5 hours.  Serve over cooked rice, noodles, or with mashed potatoes.

Stew meat can be used just like beef stew meat.  And ground venison is just like, yep, you guessed it, ground beef.  With the exception that ground venison is super lean and when you start with a pound of raw meat, you will end up with a pound of cooked meat.  A quarter-pound venison patty will still be a quarter-pound when it's cooked and served on a burger bun.  Very filling!  More bang for your buck (ha, ha, get it?  A hunting/venison pun!).

One other muscle that we eat, that I didn't mention when describing how we process our deer, is the heart.  Since it is taken out, along with all the other internal organs, during the field dressing process, I forget to include it as a cut of meat.  Here is our recipe for pickled heart, or it is also good thin sliced and sauteed up like the tenderloins.

For some other venison recipes I have posted in the past, check out this one for a soup not made with bones(!), this one using stew meat, this one for sloppy joes.  Like I said, you can substitute venison in pretty much any recipe that calls for beef.  You can use ground venison in meatloaf, in meatballs, in spaghetti or lasagna, in chili, in goulash, in Hamburger Helper, in stroganoff. . . the possibilities are endless.  We also use it to make summer sausage and hunter sticks, although those are DH's secret recipes that he is still developing--along with his perfect jerky recipe--and I'm not even privy to what all ingredients (and amounts of those ingredients) are in them, so I can't share that info (yet).

Tuesday, October 20, 2015

Just a Little Applesauce

A few weeks ago I harvested all the apples from the trees in my orchard.  I stored them in crates in the cellar until I got a minute to sort through and grab out the sauce apples.  (When I chose trees to plant in my orchard, I purposely planted our favorite pie apple variety, our favorite sauce apple variety, and our favorite 'eating apple' variety, then threw in a few more for pollinators and potential cider some day.)

My preferred sauce apples are Cortland.  They have nice deep red skins, and white flesh, and are sweet enough that I never have to add sugar to my applesauce.  The perfect no additives recipe: apples, a little water. Done.

This year I had tried something new: pinching off half the immature fruit on each tree. It is the way you are supposed to maintain your trees for larger fruit, but so far I had been too chicken to try.  I mean, what if we had a big storm, or a big drought, and most of what I had left fell off the tree before getting to maturity (aka ripeness)?

Seemed like a big gamble.  Especially since some of the apple trees didn't have a whole lot of fruit to begin with.  But, I went ahead and gave it a shot.

Every single tree produced fruit nearly twice as large as in the past.  These were apples I couldn't close my hand around.  So, definitely a difference in how much of the tree's energy went into each fruit.

But, I didn't have a ton.  Some did fall off during the growing season for one reason or another.  And, shame on me, some did fall off before I realized it was harvest time all ready.  Those mostly went to the chickens since they were too far gone for me to use in the kitchen.

The Cortlands I had left, however, went into a batch of applesauce.

First I loaded them into the sink for a good rinsing.


Then I peeled, quartered and cored them before tossing them into my stock pot.  A cool thing about the deep red skin of Cortlands is that if you don't feel like peeling them, you can leave the skins on and end up with pink applesauce!  I, however, wanted normal colored applesauce this time around, so I peeled mine.

I added just a little water to the pot (1/2 cup or so to an 8 qt pot?) to help keep the apples from sticking to the bottom as they are beginning to cook.  Then I simmered them on medium heat, stirring every 5 minutes or so, until the apples were nice and soft.

After that, I pressed them through my fruit/veggie strainer to get out any pieces of core or seeds I may have missed during the quartering and coring, and to give it that typical slightly grainy applesauce texture (if you want really smooth sauce, you can whiz your apples through the blender).  The sauce went back into the pot to be heated to a boil, then put into canning jars with 1/2 inch head space and water bathed for 20 minutes.


That's all there is to making applesauce.  No specific quantities or measuring needed.  That's what I love about making applesauce; doesn't matter if I have a ton of apples or just a few, the recipe needs no adjusting. It also doesn't need any ingredients other than apples and water.  Peel, quarter, core, cook down, strain, boil, jar, water bath.


I only got 5 pints of applesauce from my tree this year, but hey, 5 pints of 'free' applesauce (since I didn't buy any thing to make it) is better than no applesauce.

And, I did have a little left over that wasn't enough to fill another jar.  Eaten warm with a little bit of caramel ice cream topping stirred in, it was an awesome treat while I was waiting for the canner to finish processing.

Friday, August 28, 2015

Blueberry Syrup

Earlier this summer, I got a craving for blueberry syrup.  Which is basically mashed up blueberries simmered until really juicy, then the pulp and seeds strained, a sugar syrup added, then water bathed for 10 minutes.  Super cinchy to make.

Well, as has been typical for me this year, the local blueberry season came and went, and I found myself without blueberries to make syrup from.  But the thought of pancakes drizzled with blueberry syrup this winter just would not go away.

So, when on a day trip with my Mom and DD2 right before taking DD2 up to college, I happened upon several produce vendors selling local-to-them blueberries, I snatched up a 5-pound box.  I would have my blueberry syrup after all!

All I needed was a day without little ones underfoot so I could do all that boiling. . . The challenges of living with someone else's children (aka the grandkids) tend to pop up unexpectedly these days.

Finally the opportunity presented itself and I measured out 2 quarts of blueberries.  Washed, drained, and mashed them. Added a little lemon zest and a couple cups of water, then brought them to a boil and simmered for five minutes.

Meanwhile, I heated a solution of 3 cups of sugar dissolved in 4 cups of water to 260 degrees, as per the instructions in my Ball Blue Book (disclaimer, link takes you to newest edition, which I do not have and cannot guarantee contains the same recipe as my 1992 edition).  Heating sugar solution to that temperature takes a while, so I had time to strain my blueberry juice from the pulp while that was heating.


I started this process with a piece of muslin twist-tied to the legs of the stand for my canning strainer, but the juice didn't want to come out very fast.  I tried pressing down on it, but then some of the fabric slipped, leaving an opening near the top where the pulp wanted to fall out.

So I got the great idea to use a fine sieve instead.  I pulled one out of the cabinet under where I was working, lifted off the strainer, and situated the sieve over the pot.  Then I tried to remove the muslin full of juice and pulp. . .

Let's just say that didn't go so well.  I ended up scraping about a cup of deep purple pulp off my butcher block counter top when the muslin gaped open. . . Now my butcher block looks like this:


Did I mention that blueberries stain?  They stain a lot.  Pretty potent dye there.

I figure it will take the sun a couple of months to bleach that out.  Perhaps I can finally persuade DH that we do need to sand the butcher block and reseal it; I've been asking him to do that for about three years now.

Anyway, I scraped up the boiling hot pulp and tossed it in the sieve, then proceeded to drain out the juice.

Once my sugar solution hit 260 degrees, I poured in the blueberry juice, heated the whole thing back to a boil, boiled for one minute, then added two tablespoons of lemon juice.  Then I ladled the newly made syrup into half-pint jars, leaving 1/4 inch head space. Slapped lids and rings onto the jars. Into the canner they went, and processed for 10 minutes.

Now I have seven half-pints of blueberry syrup for gifting, and for enjoying on my own pancakes and waffles.  (And hopefully sometime soon, a sanded and refinished butcher block on my kitchen island.)


9/14/15 Update:  When I opened the first jar (so far) of this syrup, it is very thick.  Not pourable, but rather spoonable like cooked fruit would be versus running like syrup should be.  I'm thinking either a) I had too much pulp (and therefore pectin) in my strained blueberry juice, or b) that 260 degree sugar syrup is the cause of the thickness issue.  I wanted to make readers aware of how thick my 'syrup' turned out as a warning in case they run into the same thing by following this recipe.